Botanical Burning Bundles
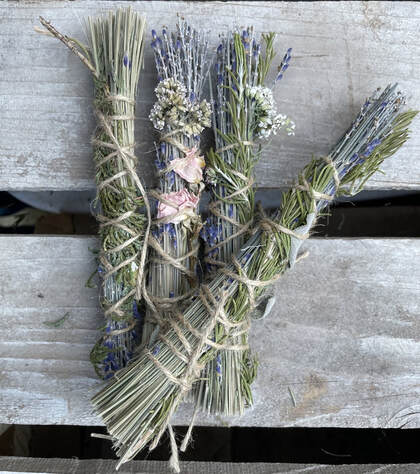
Lavender stems are a great fire starter, but they can also be used as the basis for botanical bundles to use for burning. Burning botanicals is an ancient practice used by many cultures and religions throughout time, but it is most notably a sacred ceremonial practice called smudging used in the Native American culture. What a beautiful act of connection between humans and nature.
To make your own, just grab a a handful of debudded lavender stems and then add herbs or flowers of your choosing -- though be sure to research each botanical carefully so that you aren't introducing something toxic into your home. Next, wrap the whole bundle tightly with natural twine. Let the bundle dry for a few weeks before using.
To use, light the bundle with a match and place in a ceramic bowl to catch the ash. Fan the smoke as you move around the room for just a few minutes, opening windows to add fresh air to the smoke. To extinguish, cover the ceramic bowl with another ceramic bowl. These bundles can also be used as aromatic fire starters in your fireplace.
Below are the botanicals we use as well as the traditionally held effects of each:
Lavender: Lavender brings positive energy, aids in releasing fear while calming the mind, helping to protect the spirit.
Sage: Sage is for healing. The smoke is used to bless, cleanse and heal. Sage is used to 'wash off' the outside world.
Rosemary: Rosemary clears negativity, promotes confidence and invigorates the mind.
Juniper: juniper species are used to purify and protect.
Rose:helps you to open up to both giving and receiving unconditional love and to attract the love you desire
Yarrow: Burning Yarrow is thought to bring courage, dispel fear and heal deep wounds.
No-Sew Lavender Fabric Sachets
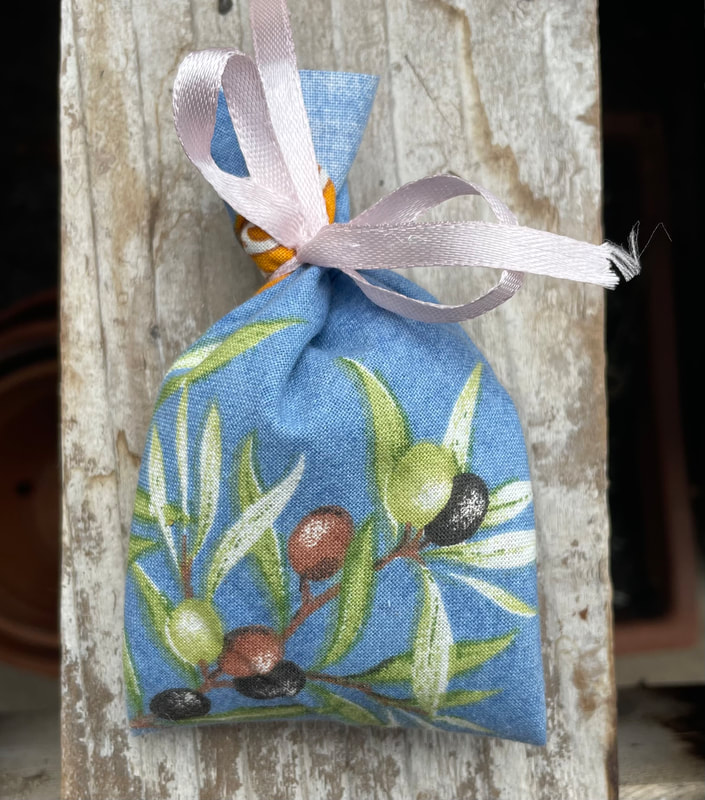
Friends! I found these adorable no-sew fabric sachets when we were in France…so if course I had to figure out how to make them myself!! They really so easy that even the "anti-crafts" among us can make one! Here’s what you do:
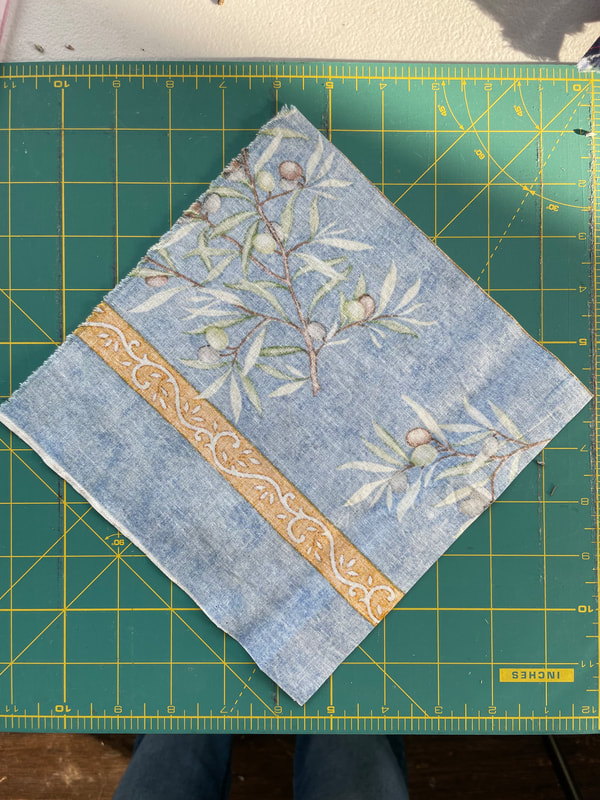
1. Find super cute fabric and cut into an 8” square.
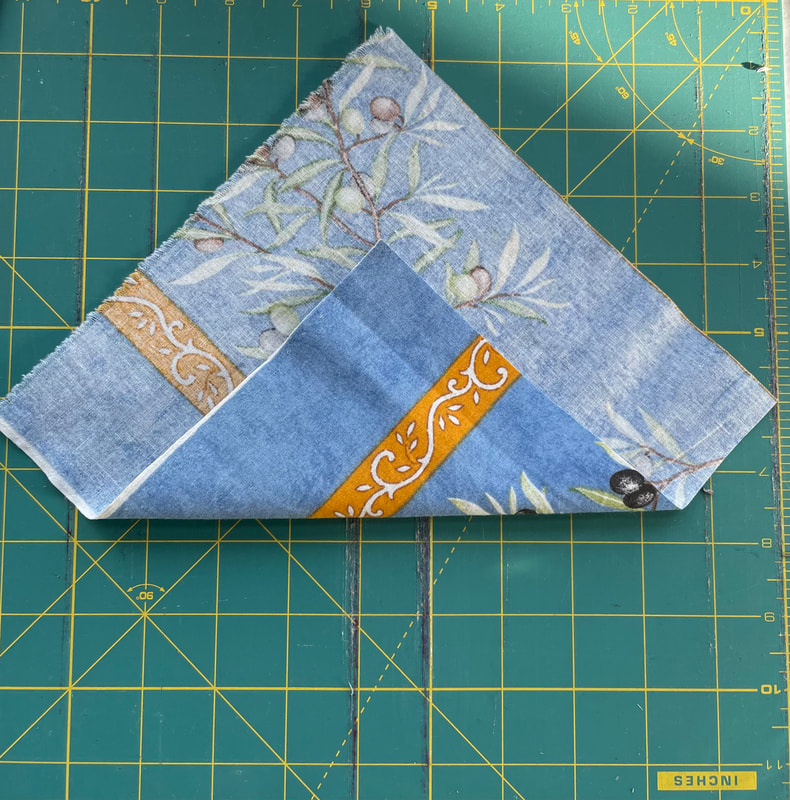
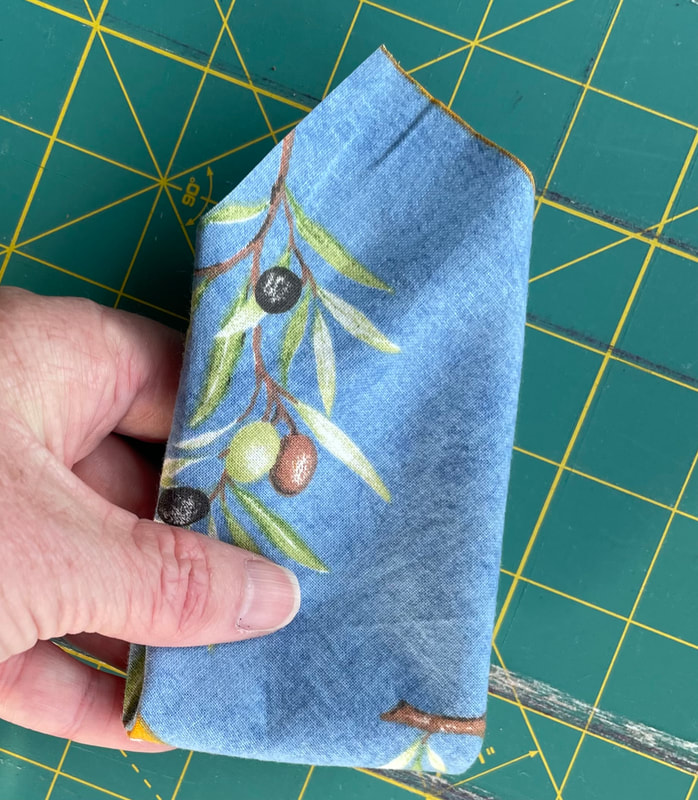
2. Fold one corner about 1/3 over.
3. Fold the opposite corner just till it slightly overlaps the other folded corner.
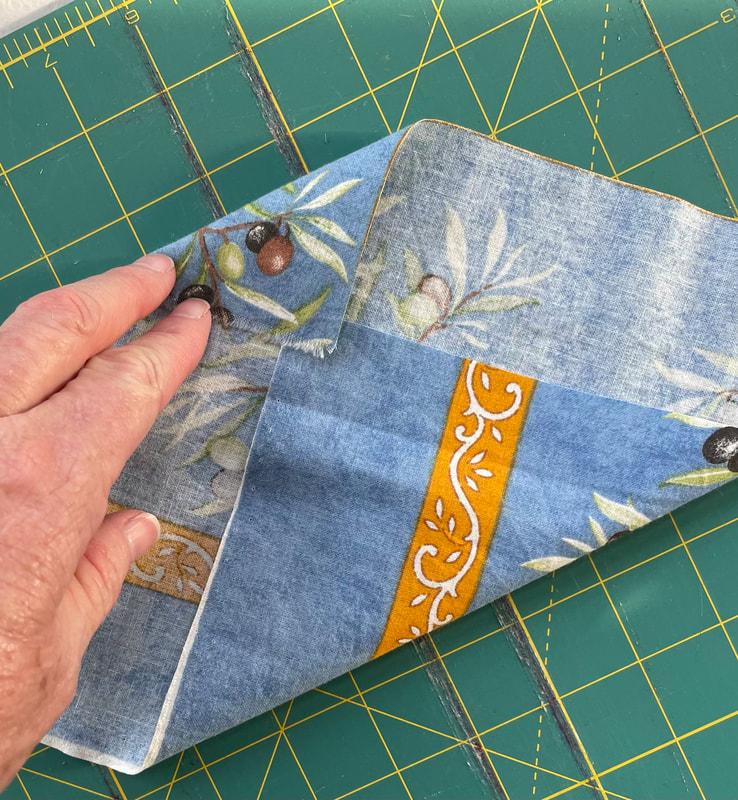
4. Fold the whole thing in half hot dog style (long ways).
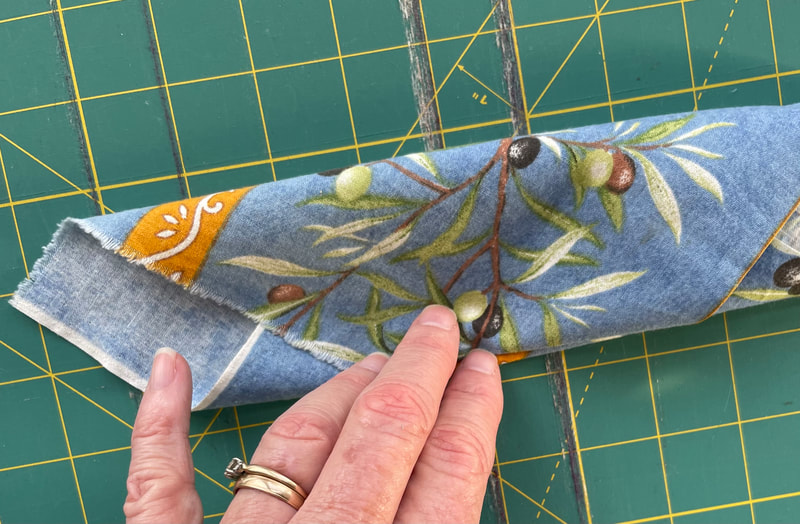
5. Now fold the whole thing in half again hamburger style.
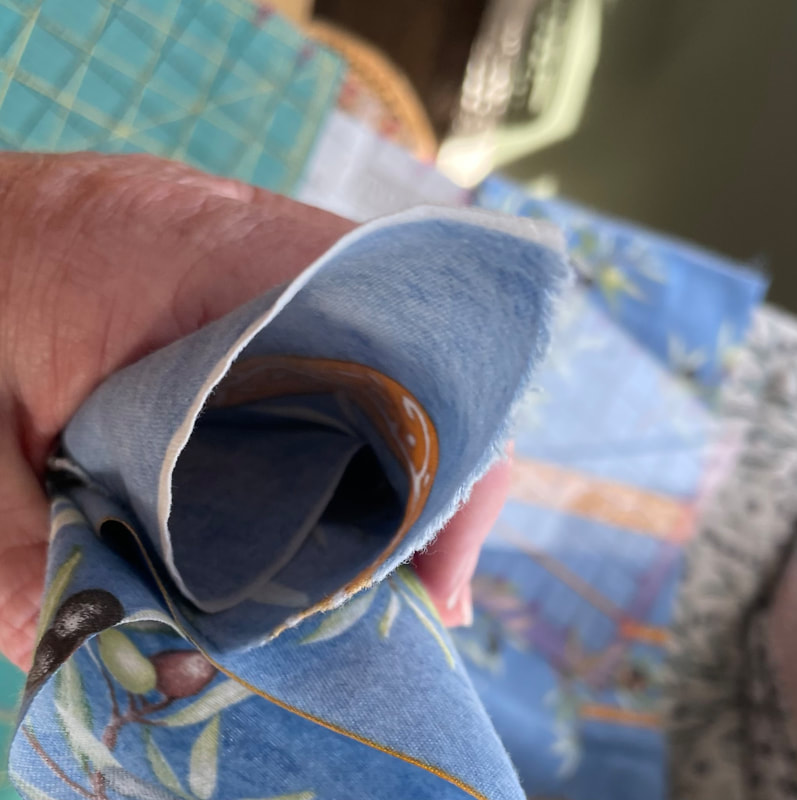
6. Open the top of half of the open side so that you have a little pocket.
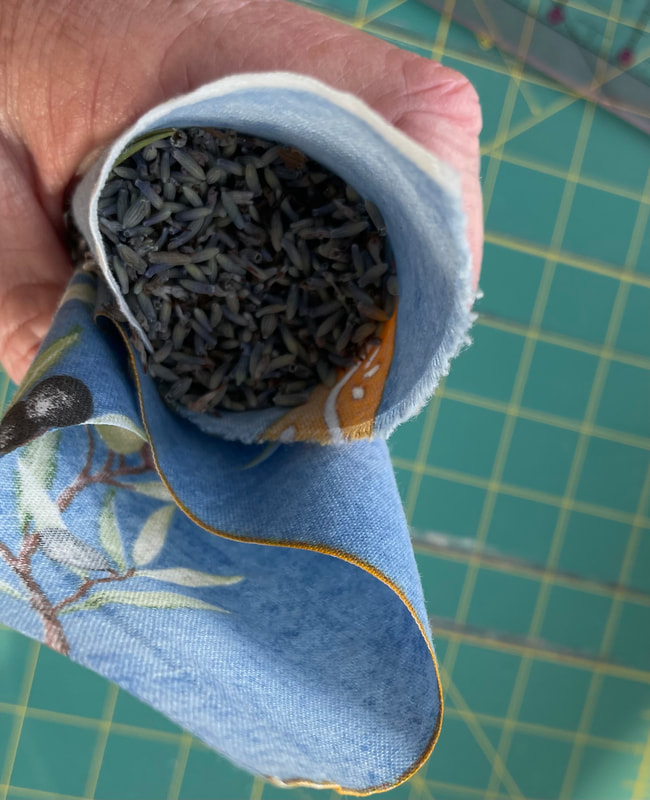
7. Fill with lavender
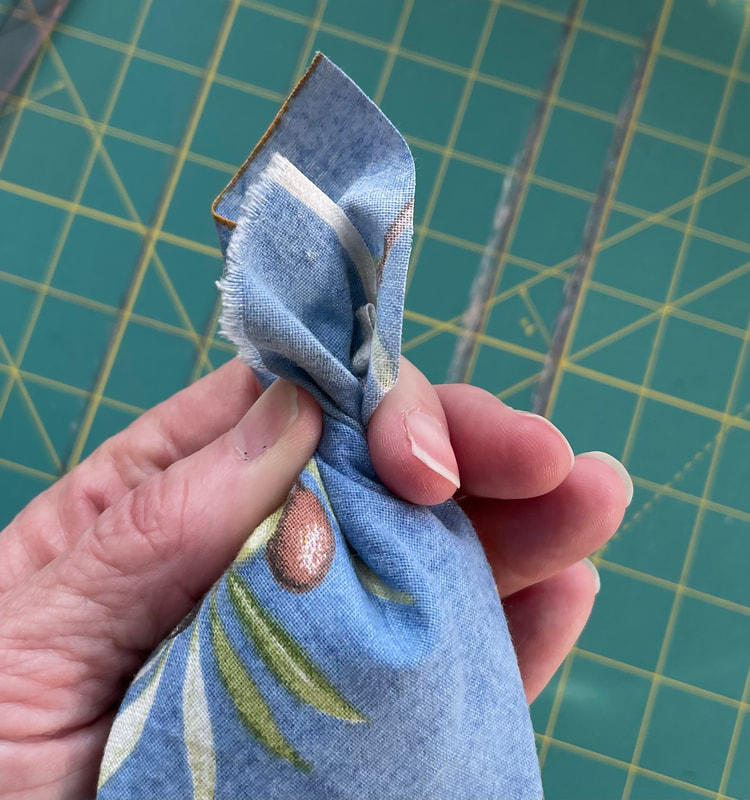
8. Twist the top to hold the lavender in and then tie with a ribbon!
Lavender Sugar Scrub
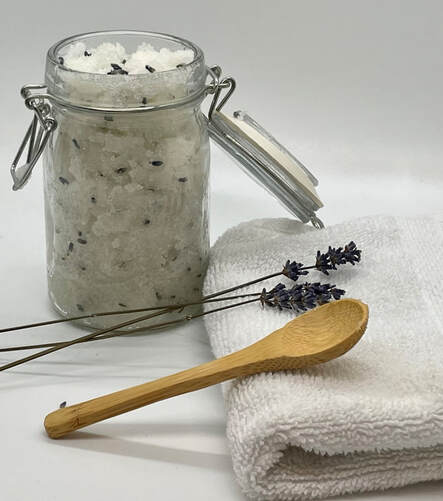
You may have heard of salt scrubs, but did you know about sugar scrubs? While salt scrubs are wonderful and very exfoliating, sugar scrubs, while also exfoliating, are more gentle on the skin since the granules are smaller.
And it’s easy to make using things you already have around the house – basically just sugar and oil. Any kind of sugar will do (I just use the sugar I have in my cupboard). And there are many different kinds of oils that you can use – sweet almond or coconut are a few. I like to use grapeseed oil though because it’s odorless, it doesn’t clog pores, and it has a high amount of antioxidants. And of course you can add any skin-safe essential oil, but the best one (IMHO) is lavender.
Lavender Sugar Scrub
Mix it all together and then spoon into a cute jar. I like my scrub a tad on the dry side but if you want it to be a little more moist, add more oil. To use, wait until the end of your shower or bath. Grab a small amount of sugar scrub and gently rub onto your skin with a circular motion. Leave it on your skin for a few minutes and then rinse off with warm water.
Avoid using on the face since even small granules can damage the sensitive areas of the face.
Your sugar scrub will be good in an airtight container for a few months. If you want to extend its shelf-life, you can put it in the refrigerator for about 6 months
Note: the grapeseed oil will make your tub or shower very slippery so plan accordingly! (Sorry…I’m a worrier)
You may have heard of salt scrubs, but did you know about sugar scrubs? While salt scrubs are wonderful and very exfoliating, sugar scrubs, while also exfoliating, are more gentle on the skin since the granules are smaller.
And it’s easy to make using things you already have around the house – basically just sugar and oil. Any kind of sugar will do (I just use the sugar I have in my cupboard). And there are many different kinds of oils that you can use – sweet almond or coconut are a few. I like to use grapeseed oil though because it’s odorless, it doesn’t clog pores, and it has a high amount of antioxidants. And of course you can add any skin-safe essential oil, but the best one (IMHO) is lavender.
Lavender Sugar Scrub
- 1 cup sugar
- ½ cup grapeseed oil
- 10-12 drops lavender essential oil
- ½ tablespoon lavender bud
Mix it all together and then spoon into a cute jar. I like my scrub a tad on the dry side but if you want it to be a little more moist, add more oil. To use, wait until the end of your shower or bath. Grab a small amount of sugar scrub and gently rub onto your skin with a circular motion. Leave it on your skin for a few minutes and then rinse off with warm water.
Avoid using on the face since even small granules can damage the sensitive areas of the face.
Your sugar scrub will be good in an airtight container for a few months. If you want to extend its shelf-life, you can put it in the refrigerator for about 6 months
Note: the grapeseed oil will make your tub or shower very slippery so plan accordingly! (Sorry…I’m a worrier)
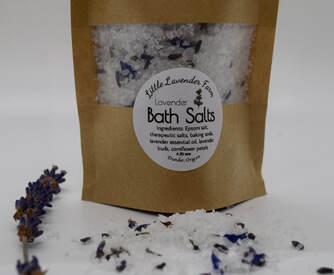
Lavender Bath Salts
A thoughtful homemade gift is always appreciated, and what better gift than the gift of relaxation with therapeutic bath salts! Making your own bath salts is actually very easy. All you need is a few ingredients, a cute container, and you’re on your way to to a relaxing soak in the tub!
Ingredients
Instructions
A thoughtful homemade gift is always appreciated, and what better gift than the gift of relaxation with therapeutic bath salts! Making your own bath salts is actually very easy. All you need is a few ingredients, a cute container, and you’re on your way to to a relaxing soak in the tub!
Ingredients
- 1 cup epsom salts
- 1 cup therapeutic salts, such as Dead Sea salts or Himalayan salts
- 3 Tablespoons baking soda
- 30 drops of lavender essential oil
- Dried lavender buds (optional)
Instructions
- Mix the salts and baking soda together, making sure to break up any baking soda clumps.
- Add the lavender essential oil and mix well (at least 100 stirs to evenly distribute the oil).
- Put bath salts in a cute bottle or bag, along with the lavender bud for an added touch if desired.
Lavender Wreath
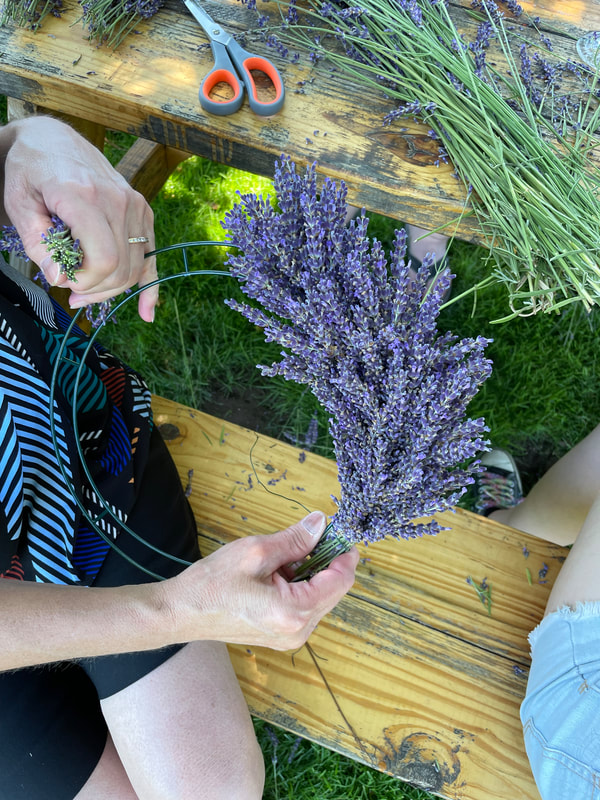
On a sunny Summer Sunday, I and twelve other women gathered at Duck Pond Winery in Dundee to make lavender wreaths together. I was honored to be asked to lead the class, so after harvesting 100 bundles of lavender to be used that day, I put on my teaching hat once again and offered instruction and assistance, while my friend Lanette played perfect hostess and filled our glasses with wine, water, food, and cocktails. Sitting at long wooden picnic tables and shaded by trees right next to the vineyard, we made more than wreaths -- we made friendships and wonderful memories. I honestly don't know how it could have been more perfect! And I can't wait to do it again next year!
Perhaps you've always wanted to attend once of these wreath making workshops but just haven't gotten around to it yet. Or maybe you’ve seen these wreaths in specialty gift shops -- those often expensive whispy bursts of purple sunshine that transport you to a softer, simpler existence. Well they aren’t difficult to make and can be easily and cheaply done in a few hours using lavender or any number of plants/herbs/tree branches from your own yard. If you’re interested, here’s a step by step of how to make your own lavender wreath (or any other kind of wreath). Maybe even call a few friends over, open a bottle of wine and make some great memories as we did!
Step 1: Gather your supplies
- A good pair of clippers
- A wreath form: We used wire forms for the class, but I have used small grapevine wreaths successfully as well. The benefit of the wire forms is their sturdiness -- they can hold a lot of lavender.
- Florist’s wire
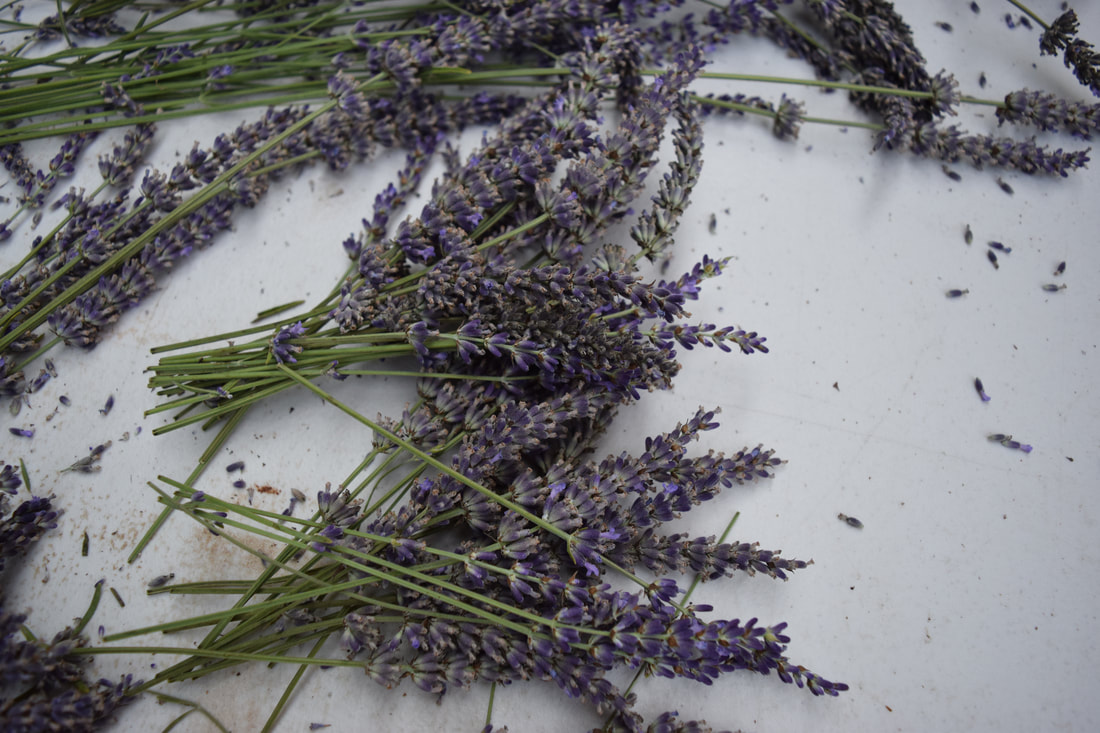
- 7-8 Lavender Bundles: Try to time your harvest so that not too many of the buds have yet opened (maybe 1/3-1/2). If too many of the buds have already opened, the wreath will look a little browner and be more “sheddy” as the flowers die and fall off. So it's better to cut the lavender before too many buds open so that the wreath retains it color. (If no lavender is close by, you can gather materials from your yard or garden. I make wreaths with all kinds of pine, spruce and cypress trees, as well as bay and rosemary. I've also seen lavender bouquets at Trader Joes.)
Step 2: Make little lavender bundles. Or not.
Some people like to make a bundle and immediately attach it to their wreath form, while others like to go through the lavender bouquets one by one and make a group of fist sized bundles of lavender for each bundle. I am in the latter group -- and I am right. Or maybe I’m not. I like to dissect a bundle at a time, pre-making and lining up all of my bundles because I find it a little easier to grab a ready bundle once I start assembling and not have to stop every minute or so to make a new bundle. This also allows me to compare each bundle to the previous one and make sure the bundles are the same length and width, which helps to ensure that your wreath will be even and not lopsided.
Some people like to make a bundle and immediately attach it to their wreath form, while others like to go through the lavender bouquets one by one and make a group of fist sized bundles of lavender for each bundle. I am in the latter group -- and I am right. Or maybe I’m not. I like to dissect a bundle at a time, pre-making and lining up all of my bundles because I find it a little easier to grab a ready bundle once I start assembling and not have to stop every minute or so to make a new bundle. This also allows me to compare each bundle to the previous one and make sure the bundles are the same length and width, which helps to ensure that your wreath will be even and not lopsided.
Step 3: Start assembling:
- Wrap the wire around the wreath form and secure it so that you can pull the wire tight and it won’t come off.
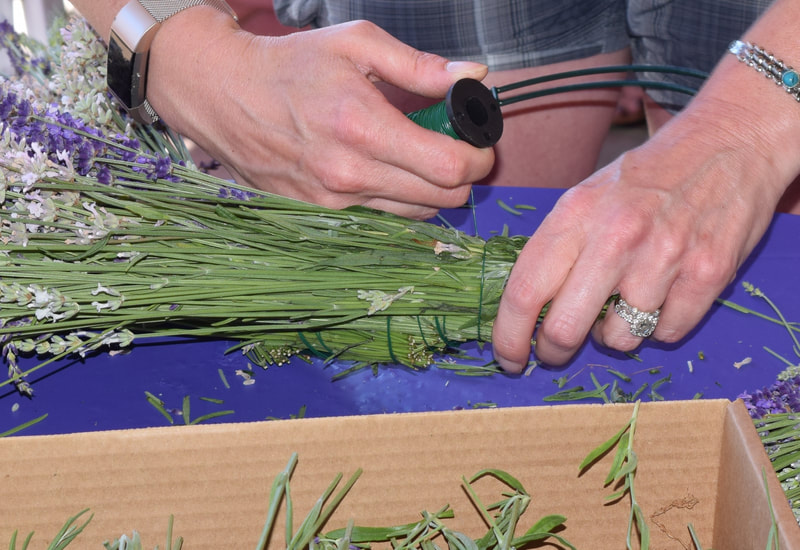
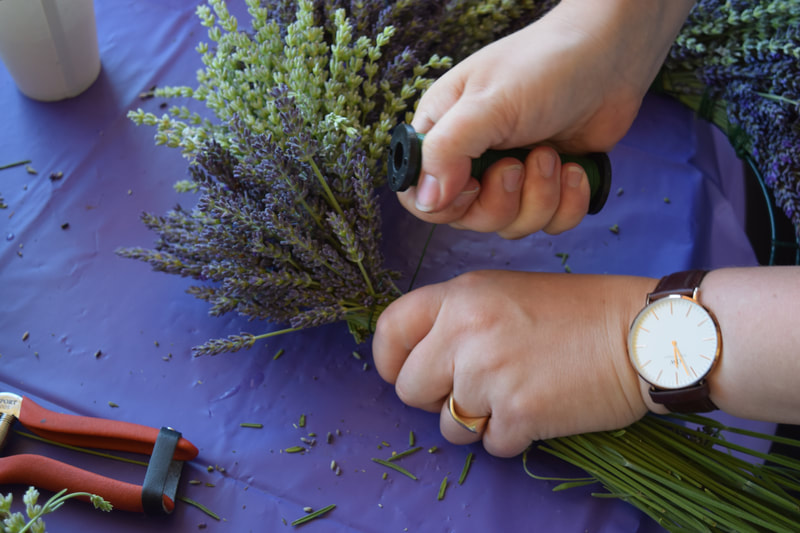
- Grab a bundle of lavender and lay it right where the wire is secured to the form. Wrap the wire around the bundle 2-3 times, pulling fairly tight. Try not to let the wire unwind too much from the paddle. It is much easier to control the wire if it is wound.
- Grab another bundle and lay it over the exposed stems of the previous bundle. Now wrap the wire around the stems of this bundle. Trim the stems if they are too long. Continue working your way around the wreath form.
- You might notice that despite your best efforts, your wreath starts to get a little lopsided. That’s OK. Because once you are done, you will hold your wreath up to decide how best to display it, perhaps positioning it so that the sparser part of your wreath is at the bottom (at least that’s what I do). Plus, a little burlap bow can hide a multitude of wreath-making sins.
- The last bundle is the most difficult. This is where you get to wrestle with your wreath for a little bit, pushing stems up, over, and down and then squeeeezing that last bundle into place before pulling that wire over the last stems. This might take a few tries.
- Once you have that last bundle in place, gently turn your wreath face down and wind the wire through the wreath form, making a small loop to finish it off so it's easier to hang.
